先普及一下概念,Infrastructure as Code,也就是从代码开始定义整个网络环境、虚机、各种资源等等。
简单说就是在云上用代码来管理一切,无论是vpc、subnetwork、lb、snat、sg、ec2……
非常符合我的胃口,因为就连架构图,都是用 graphviz 来画的。
那么 Infrastructure as Code (IAC) 可以分为以下五个部分:
- Ad hoc scripts
- Configuration Management tools
- Orchestration tools
- Provisioning tools
- Server Templating tools
一、Ad hoc scripts
就是用软件对目的主机进行 point to point 操作,用shell或者ansible都可以。推荐ansible。
在 infosys 面试被一个印度老外问到这问题,因为平时根本不用ansible 的 ad hoc 点对点模式,结果被当场问住。现在才知道这玩意是什么。当然,用 ansible 的话不建议用这个,因为 playbook 是可追溯的。
二、Configuration Management tools
配置管理,这里当然推荐 ansible,每一步的操作都可以有 inventory 和 playbook 可以追溯。
三、Orchestration tools
协同工具,k8s和kvm
四、Provisioning tools
生产工具,当然是terraform,另外,阿里云是支持plumi的,华为腾讯不支持。
五、Server Templating tools
模板工具,这里就是 Packer,其实我们公司现在的模板工具,是八戒从openstack学的,改动Cloud-init的东西。
Packer更标准一下,是进化版的东西,它既可以打kvm镜像,也可以打Docker镜像。
下面我们就看看怎么使用吧,这里先说kvm,因为kvm的比较难,docker的八戒现在还是用Dockerfile,有空了再研究packer:
安装就不多说了,就一个执行文件,下载下来就行,不用装。
Packer的核心是三个部分
- builders
- provisioners
- post-processors
我们先建立一个空目录,名字随便,就叫 test-image
mkdir test-images
cd test-image
然后在目录下面,建立三个文件:
packer.json, variable.json, setup.sh
首先看variable.json,对应AWS长这样
{
 	"description": "test image",
    "access_key": "enter-aws-your-key",
    "secret_key": "enter-aws-your-secret"
    "source_ami": "enter-yours"
 }
对应腾讯云就是这样
{
    "description": "test image",
    "tc_secret_id": "TENCENTCLOUD_ACCESS_KEY",
    "tc_secret_key": "TENCENTCLOUD_SECRET_KEY",
    "source_tc": "enter-yours"
}
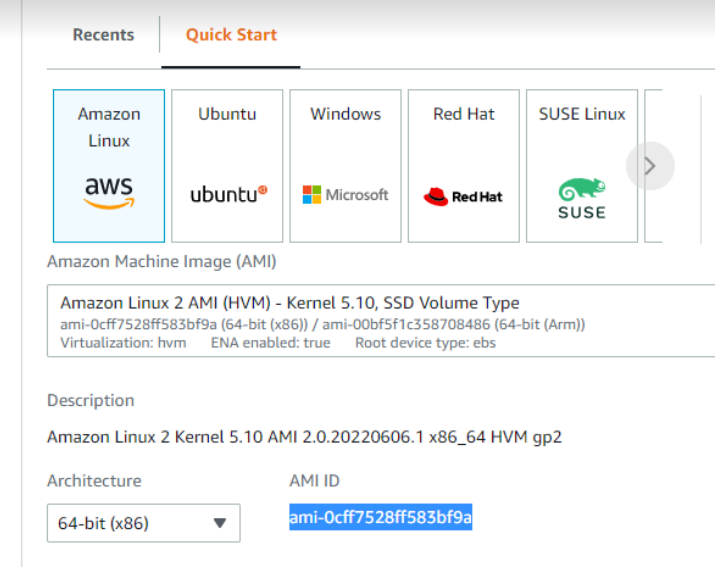
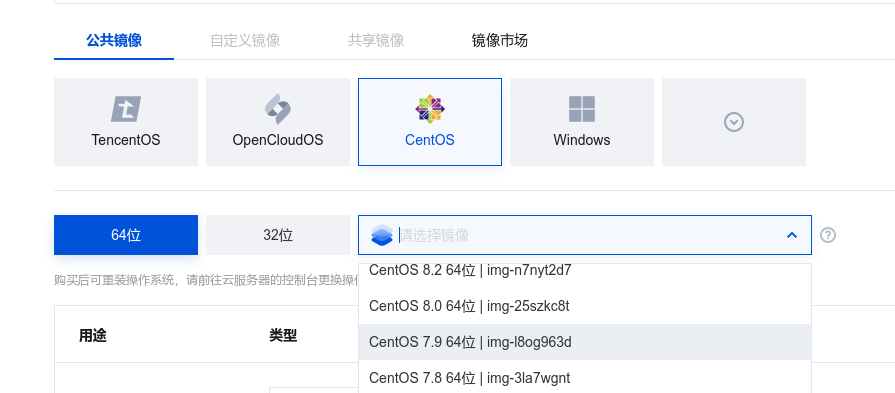
稍微解释一下,无论哪家云,你都需要去申请secret的key,才可以用,然后就是source_ami和source_tc了,这个指镜像的母版
aws的长这样:
腾讯的长这样:
ok,变量都定义好了。
下面是packer.json的正文
aws的这样:
{
	"builders": [
    	{
        	"type": "amazon-ebs",
            "access_key": "{{user `access_key` }}",
            "secret_key": "{{user `secret_key` }}",
            "region" : "us-east-1",
            "ami_name" : "myfirstami",
            "source_ami" : "{{user `source_ami` }}",
            "instance_type" : "t2.micro",
            "ssh_username" : "ec2-user"
         }
    ],
  	"provisioners": [
         {
           	"type": "shell",
            "script": "setup.sh"
         }
    ],
	"post-processors": [
         {
          	"type": "manifest",
            "output": "out.json"
         }
    ]
}
看见了吧,核心三部分。那么换成腾讯,就长这样
{
  "builders": [
        {
            "type": "tencentcloud-cvm",
            "secret_id": "{{user `tc_secret_id`}}",
            "secret_key": "{{user `tc_secret_key`}}",
            "region": "ap-guangzhou",
            "zone": "ap-guangzhou-3",
            "instance_type": "S2.SMALL1",
            "disk_type": "CLOUD_PREMIUM",
            "associate_public_ip_address": true,
            "image_name": "myfirsttc",
            "source_image_id": "{{user `source_tc` }}",
            "ssh_username" : "root"
         }
    ],
  	"provisioners": [
         {
           	"type": "shell",
            "script": "setup.sh"
         }
    ],
	"post-processors": [
         {
          	"type": "manifest",
            "output": "out.json"
         }
    ]
}
大差不差吧。
详细参数可以去看:https://www.packer.io/plugins/builders/tencentcloud
那最后就是setup.sh了,举例装个jenkins好了,其他的可以根据需要进行注入:
sleep 30
sudo yum update –y
sudo wget -O /etc/yum.repos.d/jenkins.repo \
    https://pkg.jenkins.io/redhat-stable/jenkins.repo
sudo rpm --import https://pkg.jenkins.io/redhat-stable/jenkins.io.key
sudo yum upgrade
sudo yum instqll -y epel-release
sudo yum install java-openjdk11 -y
sudo yum install jenkins -y
sudo systemctl enable jenkins
sudo systemctl start jenkins
sudo systemctl status jenkins
最后run一下:
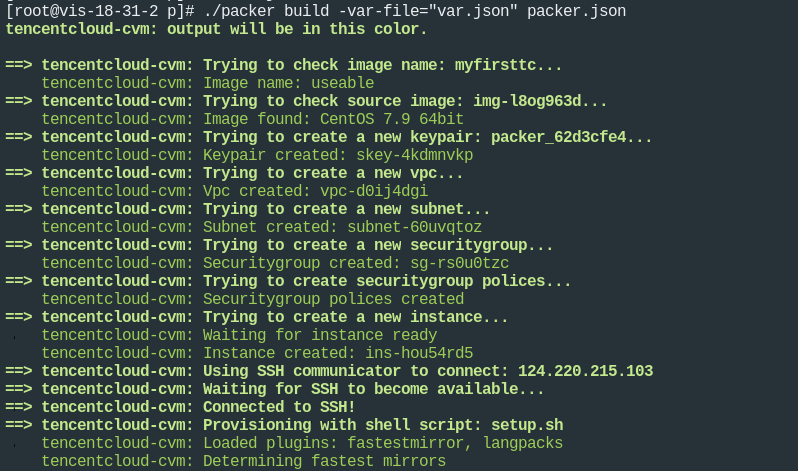
packer build -var-file="variable.json" packer.json
叽哩咕噜一顿,就build好了
Over,这个工具在IAS中是不可缺少的一环。