公司的一个公网要搬到内网的一个Rancher集群上,很繁琐
原有的架构有kafka,要在内网复现一个出来
那3节点的kafka和3节点的zookeeper,真的是不想搭啊
搜啊搜啊搜啊搜,终于找到若干平替:
Redis 的平替 Dragonfly
Mongo 的平替 FerretDB
Kafka 的平替 Redpanda
那就选定用Redpanda来搞,方法还是有一些曲折的:
Redpanda 在 2025年5月16日这个节点,有5个版本
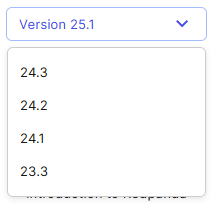
最新的25.1的版本,如果用docker compose来启动,是个压缩包,好多文件。
数据盘有三个了,而且用到了minio做后端的持久化卷,这么复杂,那不如直接搞Kafka了
那只能往前回退,选用24.2的版本,docker compose 就一个文件,不过这个版本 2025年7月31日就终结支持了。
下载的话:https://docs.redpanda.com/24.2/get-started/quick-start/
我们要的是一个broker的,那直接给出源文件
name: redpanda-quickstart-one-broker
networks:
  redpanda_network:
    driver: bridge
volumes:
  redpanda-0: null
services:
  redpanda-0:
    command:
      - redpanda
      - start
      - --kafka-addr internal://0.0.0.0:9092,external://0.0.0.0:19092
      # Address the broker advertises to clients that connect to the Kafka API.
      # Use the internal addresses to connect to the Redpanda brokers'
      # from inside the same Docker network.
      # Use the external addresses to connect to the Redpanda brokers'
      # from outside the Docker network.
      - --advertise-kafka-addr internal://redpanda-0:9092,external://localhost:19092
      - --pandaproxy-addr internal://0.0.0.0:8082,external://0.0.0.0:18082
      # Address the broker advertises to clients that connect to the HTTP Proxy.
      - --advertise-pandaproxy-addr internal://redpanda-0:8082,external://localhost:18082
      - --schema-registry-addr internal://0.0.0.0:8081,external://0.0.0.0:18081
      # Redpanda brokers use the RPC API to communicate with each other internally.
      - --rpc-addr redpanda-0:33145
      - --advertise-rpc-addr redpanda-0:33145
      # Mode dev-container uses well-known configuration properties for development in containers.
      - --mode dev-container
      # Tells Seastar (the framework Redpanda uses under the hood) to use 1 core on the system.
      - --smp 1
      - --default-log-level=info
    image: docker.redpanda.com/redpandadata/redpanda:v25.1.4
    container_name: redpanda-0
    volumes:
      - redpanda-0:/var/lib/redpanda/data
    networks:
      - redpanda_network
    ports:
      - 18081:18081
      - 18082:18082
      - 19092:19092
      - 19644:9644
  console:
    container_name: redpanda-console
    image: docker.redpanda.com/redpandadata/console:v3.1.0
    networks:
      - redpanda_network
    entrypoint: /bin/sh
    command: -c 'echo "$$CONSOLE_CONFIG_FILE" > /tmp/config.yml; /app/console'
    environment:
      CONFIG_FILEPATH: /tmp/config.yml
      CONSOLE_CONFIG_FILE: |
        kafka:
          brokers: ["redpanda-0:9092"]
        schemaRegistry:
          enabled: true
          urls: ["http://redpanda-0:8081"]
        redpanda:
          adminApi:
            enabled: true
            urls: ["http://redpanda-0:9644"]
    ports:
      - 8080:8080
    depends_on:
      - redpanda-0
仔细看了一下,这里面有问题,卷是空的,这可不行,必须持久化到本地,改一下
volumes:
  redpanda-0:
    driver: local
    driver_opts:
      type: none
      device: /data/redpanda/data
      o: bind
然后直接启动:
docker compose up -d
其实是启动了两个容器,一个数据端;一个是console,客户端
我们打开8080 web的端口,那客户端呢,连的就是19092端口,用法跟kafka完全一样。
